1. Go to site https://onesignal.com/ and click “Get Started Now”


3. Confirm your account from your email and fill up your account details.
4. Create a new App. Put the name of your application and organization details, select platform (iOS or Android and click the button “Next: Configure your platform”.

5. To configure Google Android (FCM) platform, click “Retrieve from your Firebase Console”. Do not close the OneSignal.com page.

6. Click “Get started” and login with your Google Account.

7. Click “Create a project”.

8. Enter the name of your project, accept Terms of Service and click “Continue”.

9. Enable Google Analytics for this project and click Continue

10. Set Analytics location, accept Google Analytics terms and click the “Create project” button.

11. Wait until the project is set up, then click “Continue”.

12. Click settings icon and choose “Project settings”

13. Navigate to Service accounts.
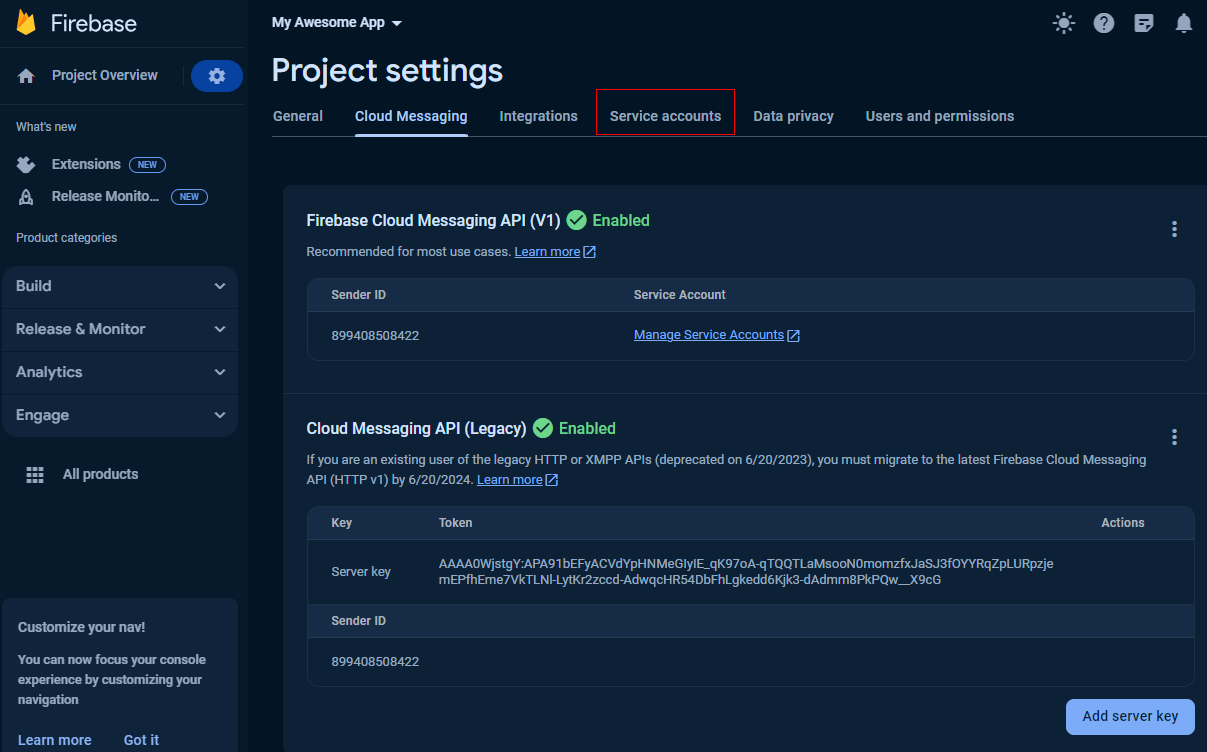
14. Select Admin SDK configuration snippet: Java and click Generate new private key. The key JSON file will be downloaded to your computer.
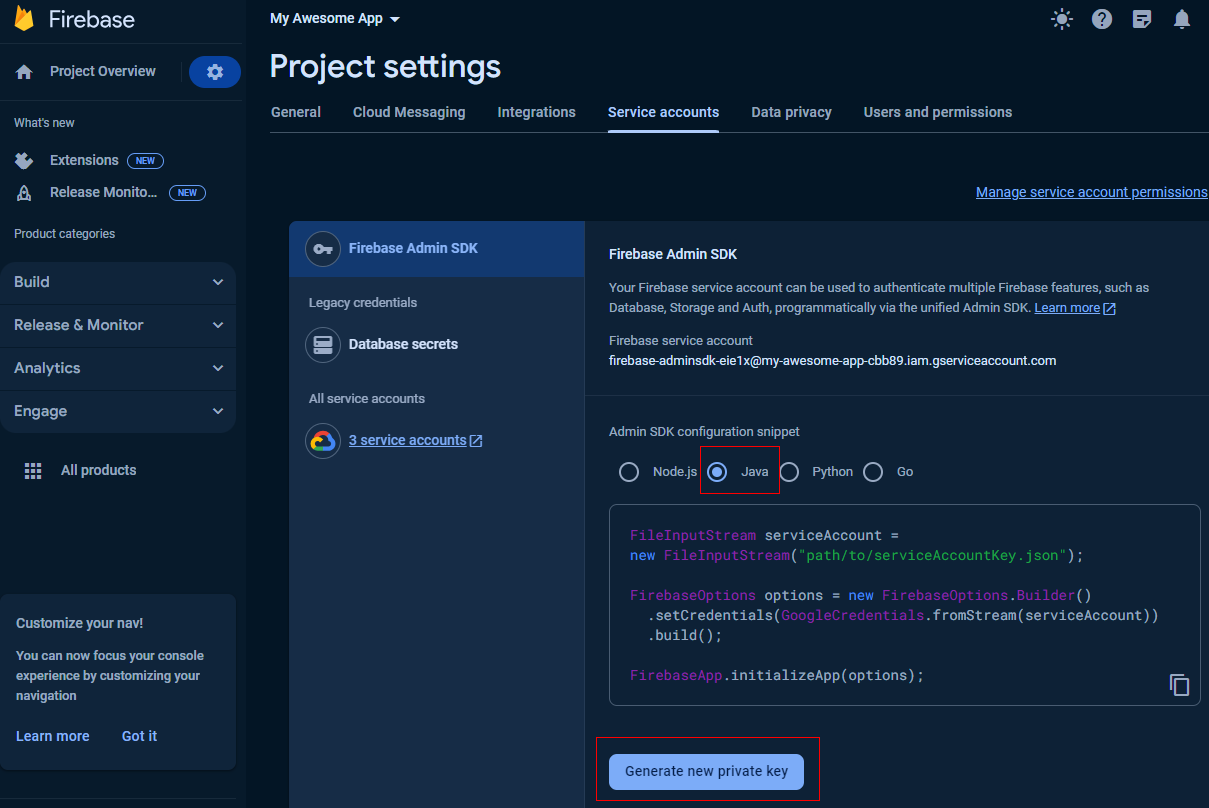
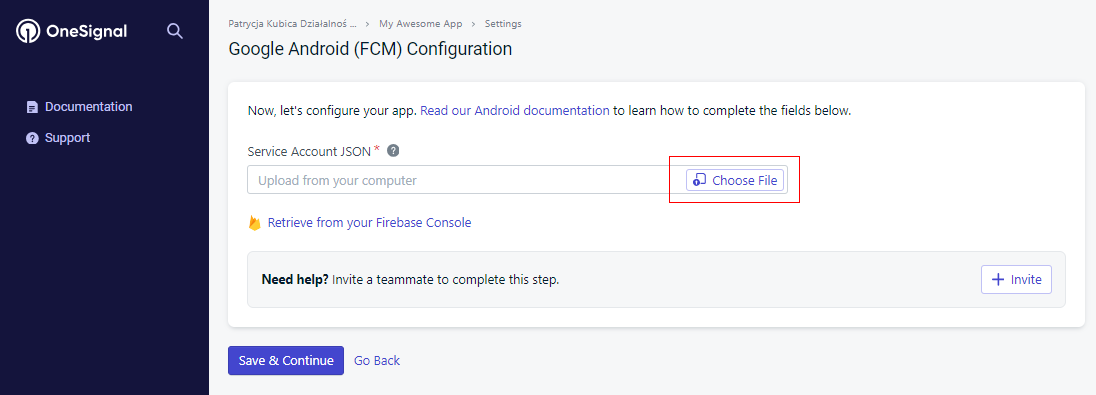
15. Return to OneSignal dashboard. Click “Choose File” button and upload the JSON file.
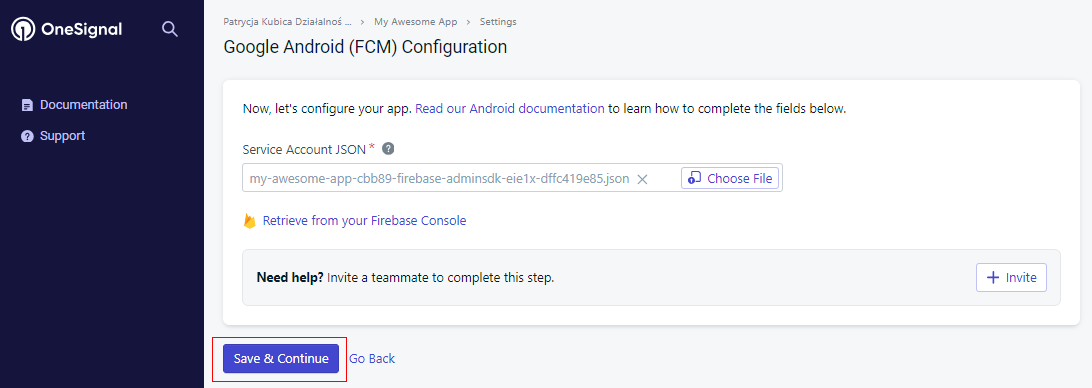
16. Click button “Save & Continue”.
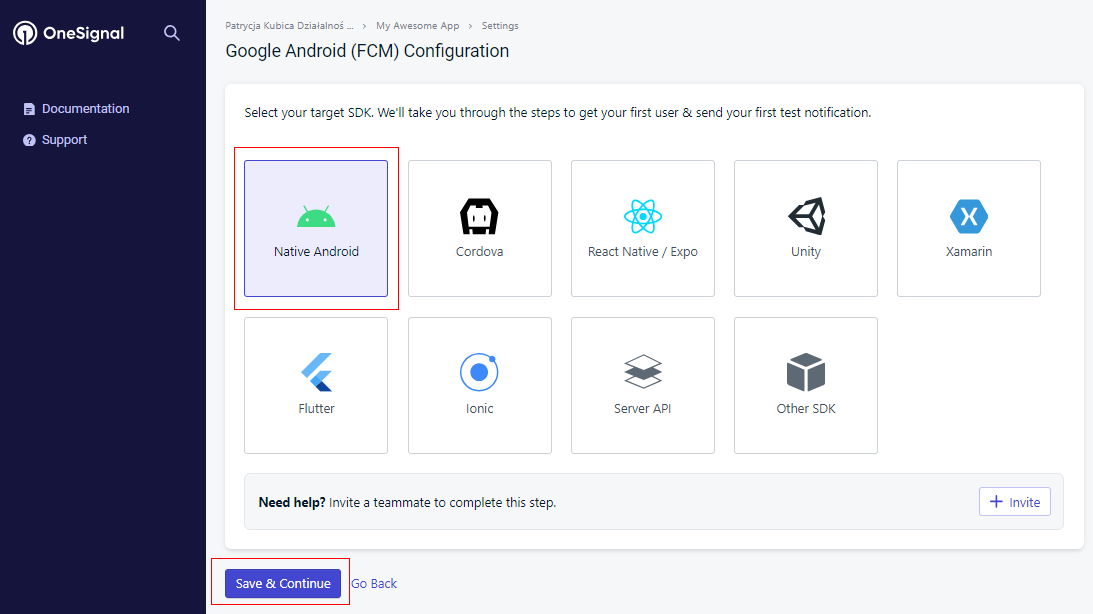
17. Select target SDK: Native Android and click “Save & Continue”.
18. Save your App ID and click Done.
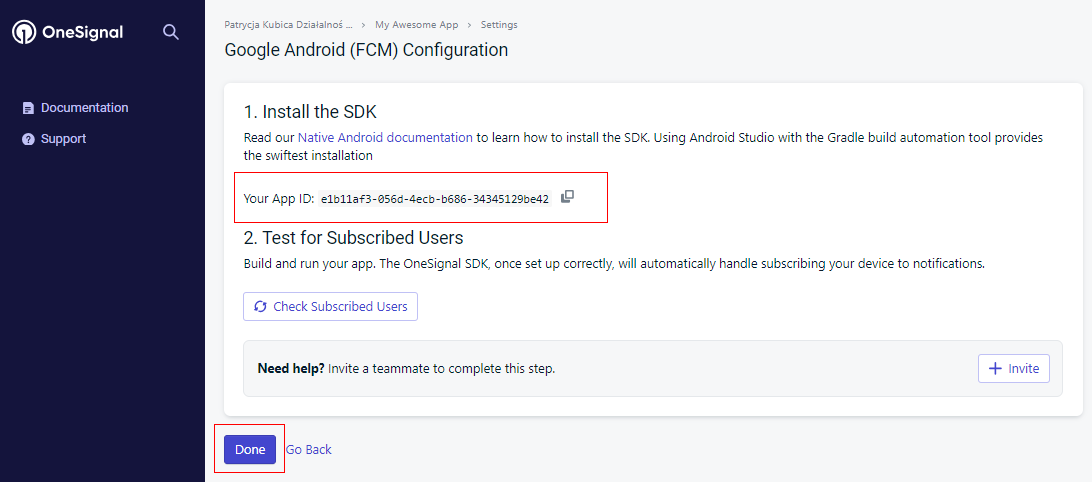
19. Paste the OneSignall App ID in the App Creator’s “Push Notifications” field or send through the ticket.


