If you do not have all the required software yet, you can easily download Winamp and SHOUTcast DSP Plugin from our website.
Before you start the configuration process, log in to the Centova Cast Panel and select the Quick Links section. 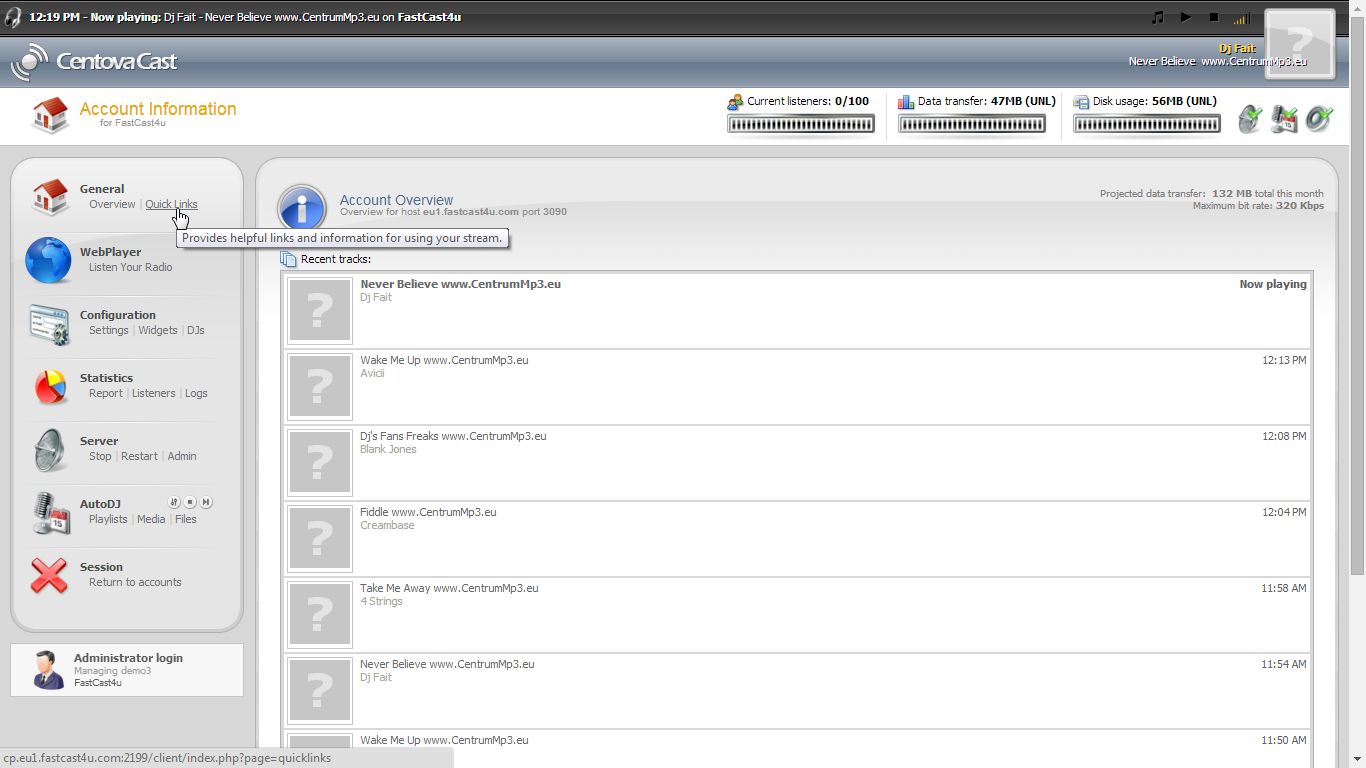
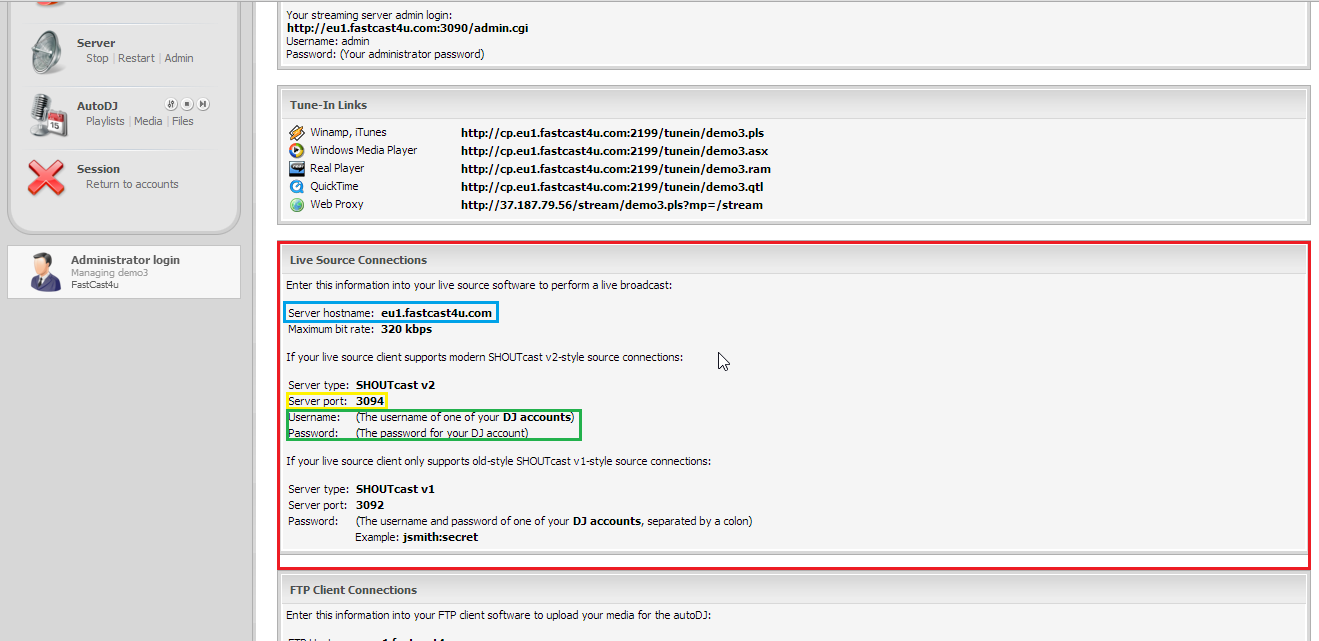
Find ShoutCast/Icecast server details under Live Source Connections: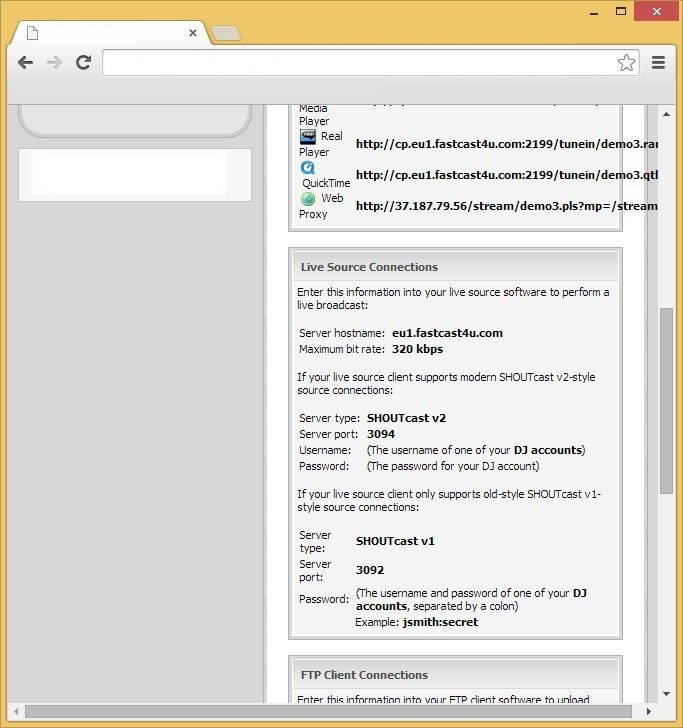
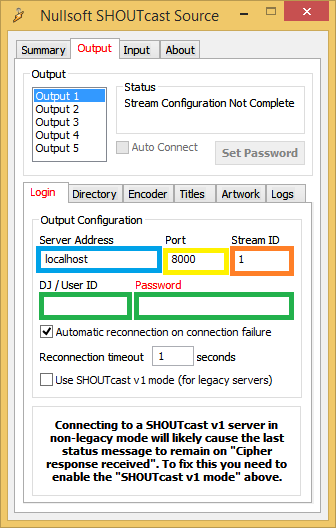
Open Winamp with a DSP plugin installed. If your DSP plugin did not open, then push CTRL + P and enter DSP/Effects under Plug-ins tab. Then just double click Nullsoft SHOUTcast Source DSP.
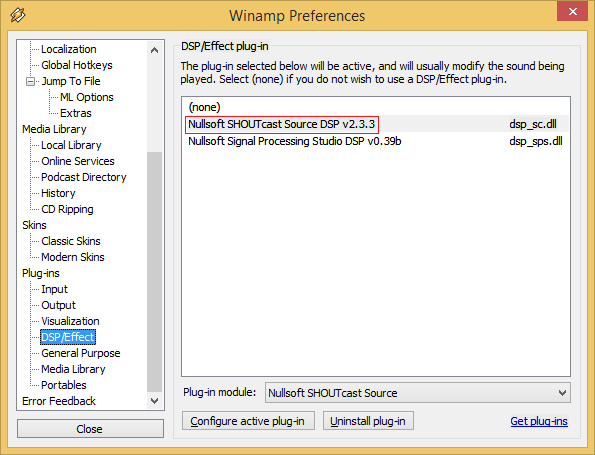
You should be able to view Winamp with a DSP plugin like presented below: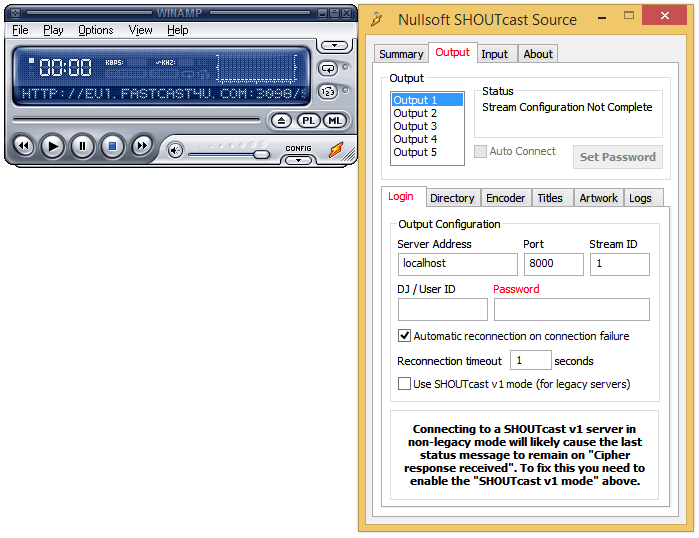
You will see an Encoder Settings button if you selected the AAC codec or a list with Encoder Settings if you selected MP3.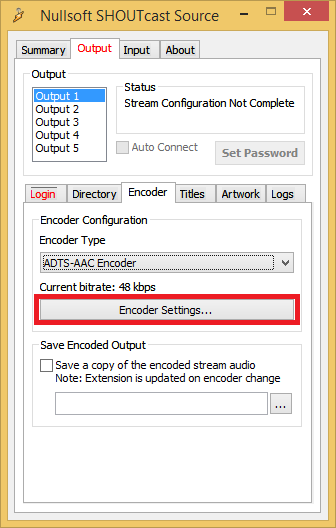
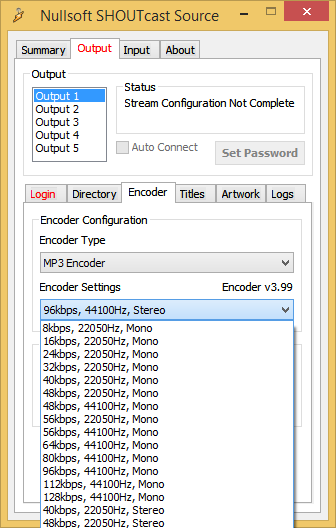
A window with a bitrate slider will open. Select an appropriate bitrate. Remember, not to exceed your maximum limit, you can easily check it in Centova Cast Control Panel.
(Note: If you use Auto DJ the bitrate of your live stream should match the bitrate set up for Auto DJ) 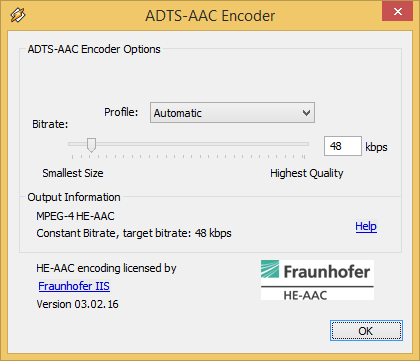
The maximum bitrate for your server is visible here: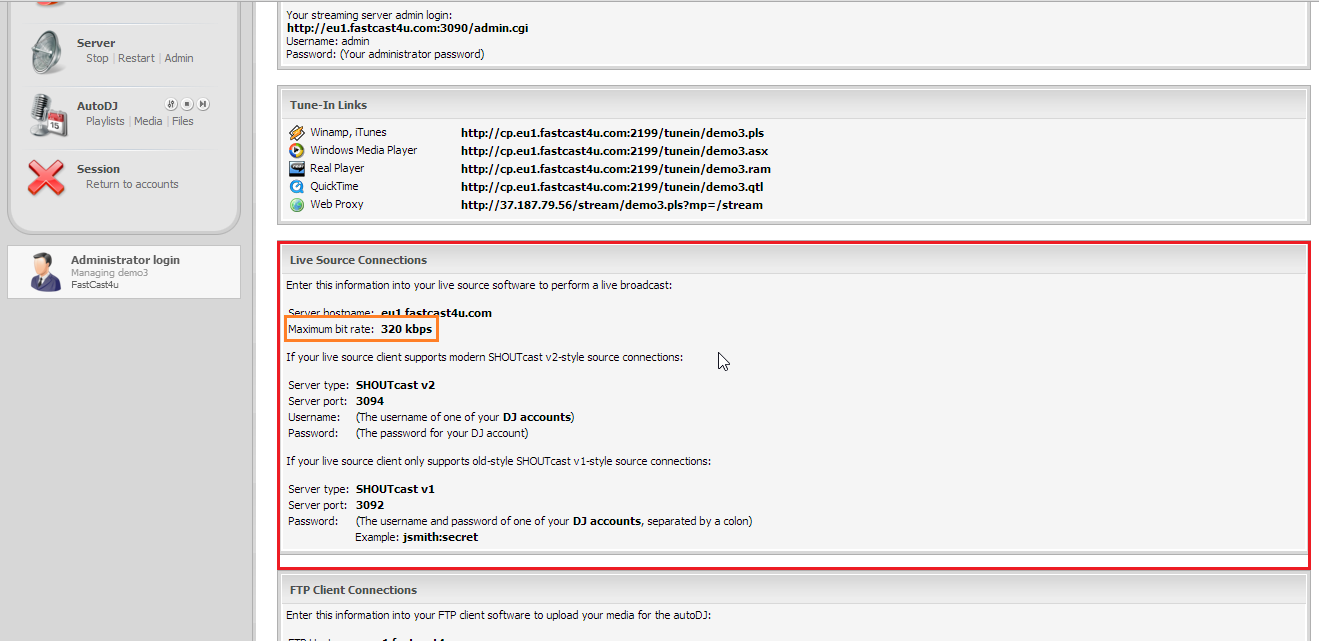
To connect to a Shoutcast v2 server, enter details marked on a screenshot below. You need to enter the server address, port, DJ username, DJ password and Stream ID (mount point number, the default setting is "1").
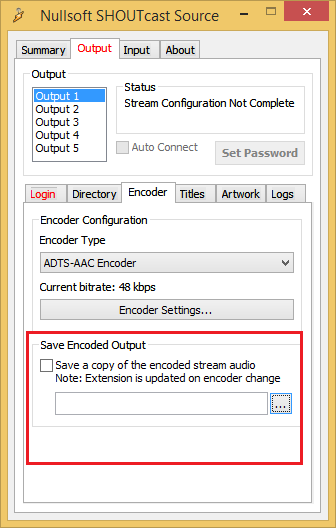
If you wish to record and save your stream, Select "Save Encoded Output", and choose the location where it should be saved.